
June 1, 2024
How to Repair Chipped Baseboards: A Step-By-Step Guide
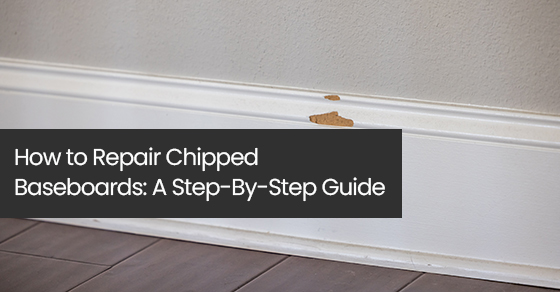
Your baseboard moulding takes a lot of abuse over the years. From scuff marks to vacuum dents and pet scratches to chips, neglected baseboards can make your home feel unloved.
In this article, we will provide a step-by-step guide to repairing chipped baseboards for a quick DIY project that helps refresh your home.
What is baseboard moulding?
Baseboards are a type of moulding installed along the bottom of your walls. They protect your drywall from damage, help keep your floors secure, and add a decorative, finished look to your walls and flooring.
They are available in a number of materials, including PVC, MDF, stainable wood, paint-grade wood, and flexible materials for curved walls. Baseboards are often installed with ¾ inch trim as a finishing touch that is more secure. Baseboard moulding trims are required to keep your floor moulding baseboards in shape.
What tools are used to repair chipped baseboard moulding?
You’ll need a few basic tools and materials to repair your chipped baseboards, including:
- Eye protection
- Sandpaper
- Putty knife
- Damp, clean cloth
- Spackling/filler
- Caulking and gun
- Primer
- Paint
- Paintbrush
What steps are involved in repairing chipped baseboard moulding?
You can follow these steps to repair your chipped baseboard moulding:
1. Scrape and sand loose paint
You need to prep your baseboard surface to create a clean slate for filler and paint. Start with a putty knife to scrape away the loose paint, and then finish by sanding everything down to create an even surface.
Don’t go at the paint too aggressively as you can cause more damage. Instead, gently coax the loose paint from the boards. We strongly advise you to wear eye protection as paint chips will be flying!
2. Fill the damaged areas
Removing the loose paint makes it easier to spot the damaged areas. It also ensures your spackling or filler adheres to a firm, smooth surface so it doesn’t peel or crack.
Your goal is to fill the dips caused by the areas where the paint has chipped to create an even surface. Using your putty knife, scoop up the filler and drag it across the area at a 45-degree angle. Try to smooth it out as best you can to make sanding the area easier.
When scraping away the excess filler, adjust your putty knife to a 90-degree angle to the wall and be gentle so you don’t remove the filler. Once it seems even, gently wipe away the excess with a damp, clean cloth as you work.
You need to do this before it dries, or it will make sanding a nightmare. While it might be tempting to put a big glob on for deeper damage, it’s best to apply a few thin coats instead. Let the filler dry completely before moving on to step #3.
3. Lightly sand the coat
Test with your finger to make sure the coat of filler is dry. Then, gently sand the area. Stand back and look at your work to determine if a second coat is required. In more severely damaged areas, you might need up to three coats.
4. Fill in tiny holes and dents
While the filler dries, look for other smaller imperfections like nail holes and dents. You might as well do a thorough job and create a perfectly smooth surface while you’re at it!
Use a product such as paintable caulking and squeeze a bit out of the tube, and wipe the excess away with a damp cloth.
5. Do a final sanding
Once the final coat of filler has dried, do a final sanding and look for any remaining (or new) imperfections you can quickly repair with your caulking. Since you’ll have to paint the repaired baseboards to hide the repairs, you should sand the entire baseboard to prepare them for the primer and paint.
6. Caulk gaps between the wall and baseboard moulding
This is a good opportunity to fill in those gaps that might exist between the wall and your baseboard moulding. Make sure the surface is clear of the dust created from your sanding.
Hold your caulk gun at a 45-degree angle and drag it steadily along the edge of the moulding. Try to do it in one long drag if possible. Of course, this is harder to do for very long walls.
The trick is to keep the caulking at a steady stream and even application to reduce the work needed once the caulking is done. Immediately run a damp, clean cloth along the wall to even out your work and remove any excess caulking. You can also use your finger if you prefer!
7. Paint the baseboard moulding
Once you’ve evened out and perfected the surface of your baseboard moulding, it’s time to paint. Tape off the floor and wall, and apply an even coat of good-quality primer.
Allow it to dry, and then apply your paint. You might need two coats of paint for a clean, even look. This will make your floor moulding baseboards look great.
When to Replace Your Baseboards
While the above steps are relatively easy, they are also very time-consuming. You might consider replacing your baseboards instead when:
- Your baseboards are severely damaged, with large cracks that are creating an uneven look along the top of the baseboards.
- The “profile” (the design of the moulding) of the baseboard is damaged, so your repairs are very noticeable.
- The entire length of the baseboard is severely damaged.
- There are badly damaged areas you need to replace and you can’t find a profile or height match.
- The very top and/or bottom of the baseboard is damaged.
- The baseboard moulding is warped.
In these cases, the damage will be far harder to cover up, so a total replacement is a better option than repairs.
Contact the Baseboard Moulding Experts
Giving your baseboards some TLC helps keep your entire home feeling loved! If you find your baseboard moulding is beyond repair, though, replacement is an excellent option. Cosmaroma offers an impressive selection of baseboard moulding that is ready for installation.
Are you ready to install new baseboard moulding? Click here to start shopping our selection. You can also call us at (855) 457-1039 or contact us online for more information.