
May 1, 2024
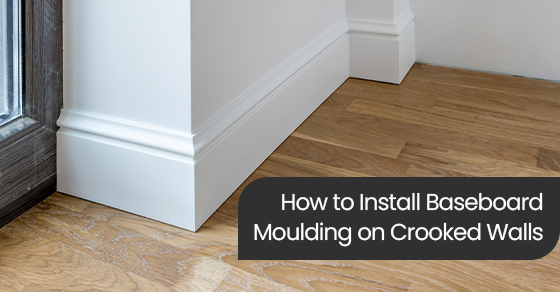
How to Install Baseboard Moulding on Crooked Walls
When you’re all set to upgrade your baseboard moulding, or finish up a flooring installation with some nice fancy trim, you might find out the hard way that your walls are crooked.
This is a disappointing discovery when you’re all about doing it yourself, but it doesn’t have to stop you from completing your project! In this blog, we will share tips on how to install baseboard moulding and overcome the challenges of crooked walls.
What are baseboard mouldings?
Baseboard mouldings are installed at the bottom of walls. They are a decorative way to add more detail to your home and provide a practical purpose, securing your floors or holding carpeting in place.
They come in a wide range of designs and materials, allowing you to choose the right look to reflect your home’s style, whether it is modern, classic, rustic, or something in between. Baseboard mouldings are often paired with ¾ inch-round trim to hold them in place and provide a more finished look.
Have the Right Tools
Any baseboard moulding installation project is easier with the right tools. Although you don’t have to invest in our recommended list, if you do a lot of DIY projects around the house, they’ll be worth it. We recommend the following:
- Mitre box and a good-quality saw for manual cutting
- Nail gun
- Screwdriver
- Paintable latex caulk and gun
- Wood adhesive
- Clean cloth
Use Caulk to Hide the Gaps
This is by far the easiest approach to help hide smaller gaps caused by uneven walls. Use a premium, paintable latex caulk and run your caulk gun along the top of the baseboard to fill the gaps.
Remove the excess using a damp rag; this should resolve your gap issues. Paint once the caulk is dry.
Create a Handy Scrap “Wedge”
If you see larger gaps between your baseboard moulding and the wall, caulk won’t work. The best approach here is to jury-rig a handy wedge to help adhere the baseboard moulding to the wall and close those gaps:
- Cut a few pieces of scrap moulding into 4 to 6 inch lengths, and then cut them at 45 degree angles at each end.
- Apply some wood glue to the areas with the gaps, and tack the moulding in place with your nail gun.
- Use your scraps to help put pressure on the glued areas with one end on the floor and the other against the baseboard. It will create a “triangle” between the wall, floor, and scrap.
- Nail the scrap top to the trim with 1 inch brad nails to hold them in place.
- Leave it overnight to create a solid seal.
- Tap the scraps free with a hammer in the morning.
- Fill the nail holes and sand before painting.
Fill Floor and Wall Gaps
If you find gaps between your drywall and floor, you’ll need to fill those gaps so the moulding doesn’t start to drift towards the gap over time. You can correct this issue using scrap blocks made of ½ inch scrap plywood.
Cut them into 4 to 6 inch strips, and then place them between the wall and floor to fill the gap every few feet or so. This will give you something to nail your baseboards into place, keep them secure and prevent tilting.
Adjust for Corners
This is where the frustration is likely to set in! Once you hit the corners in a home with crooked walls, you’re contending with an issue on either side. Since it’s pretty much impossible to find a perfect 90-degree angle between two walls, you can use an easy trick to help create perfect corners, using a screw:
- First, cut two test pieces of baseboard mouldings to help you adjust for the gaps.
- Insert a 2-inch screw into the drywall on one side below the line where your baseboards cover.
- Make sure it sticks out about a ½ inch.
- Place your test pieces into the corner, and put pressure on them to see if you need to either sink the screw into the wall further or pull it out a bit more.
- Continue to adjust until you get a snug fit.
- Once you find the right fit, you can cut the real baseboards and install them.
- Fill any remaining gaps with caulk.
Adjust for Outside Corners
For outside corners, you’ll need to adjust the angles:
- Start with 45-degree angles on test pieces of moulding to see how they line up.
- This is finicky, so you’ll likely need to try several angles until you get it right.
- Make sure you keep your mitre saw settings written down so you can use the right ones when you do your final cuts.
Master Your Splices
A pro tip when installing moulding on longer walls is to use 30 degree bevels when splicing two lengths together. This creates a less obvious joint on crooked walls, as the two pieces lay one on top of the other instead of side by side:
- Cut the first board at a 30 degree angle so it is facing the room and nail it in place.
- Cut the second board at a 30-degree angle in the opposite direction so it is facing the wall.
- Apply glue to both angles.
- Lay the second board over the 30 degree angle of the first board and nail it in place.
- Use caulk to hide the joint line.
Use Flexible Baseboard Mouldings
If you live in a home with wonky walls, it helps to choose a baseboard material with a little more give. Very solid, inflexible mouldings won’t be as forgiving and will stubbornly hold their shape.
As a result, you won’t be able to ease them into bending a bit as you use the above tactics to help correct for the uneven walls. Give the moulding a flex test and choose one that will make life easier.
Contact the Baseboard Mouldings Experts
While crooked walls can be a major pain for the DIYer working on a baseboard moulding project, these tips will help you manage the job like a professional.
For more information about baseboard mouldings or to start shopping, click here to visit Cosmaroma’s moulding selection, or click here to find a store near you.