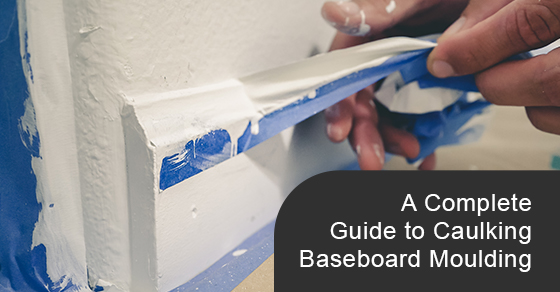
A Complete Guide to Caulking Baseboard Moulding
Caulking is an essential part of the home-improvement process. In addition to filling gaps and making the joinery look flawless, this sealant serves as an important barrier to keep drafts out of your space. As well, caulk fills in dust-collecting crevices, making the baseboards easier to clean.
With this step-by-step guide, you can caulk your baseboards in a way that creates neat edges and joints. There are also some tips for keeping things clean as you work on your home improvement caulking project.
Once you get the hang of using a caulking gun, the process of caulking baseboards couldn’t be any easier. In this article, we have broken it down into eight easy steps. The steps below apply to both paint and stain-grade baseboards.
8 Steps to Being a Home Improvement Caulking and Baseboard Star
1. Gather the correct tools and accessories
Before you begin, gather everything you will need, including all the home improvement hardware. Make sure your knees are protected. Kneeling will affect the health of your knees even if they are in good shape. When you are uncomfortable, it is very difficult to produce quality results. You’ll need the following tools and materials:
- Caulking
- Caulking gun
- Knee pads or knee rest
- Bucket of warm water
- Wood filler
- Rags
- Painter’s tape
- Putty knife
- Paintbrush
- Hammer
- Nails
- Utility knife
2. Choose the proper caulking
There are many home improvement caulking compounds available, and choosing the right one can seem overwhelming. You will need a paintable caulk with a latex base that clearly states you can paint on it. Silicone-based caulks are great for tubs, toilets, and sinks, but they do not usually take paint well.
3. Prepare the baseboards
Corners can be filthy, so get your old paintbrush out and dust the corners carefully. Check for damage or pesky nails sticking out of the baseboard’s edge. Take a few minutes to make any repairs or hammer in half-set nails. It’s best to fill any holes with a wood filler, as they sand easily for a perfectly smooth surface.
4. Tips for applying and removing the painter’s tape
With stain-grade baseboards, the use of painter’s tape is not necessary or even possible due to the profile of your baseboard, but it can be helpful. When using tape, lay a strip along the top edge of your baseboard ensuring the tape is free of air bubbles or gaps where the paint can bleed.
The tape helps to ensure a clean job, but if you are handy with a caulk gun, you will not need it. Timing is important when removing the painter’s tape. If the caulk dries before you remove it, the tape can leave edges in your seam. Remove the tape slowly, and smooth any rough spots with a wet finger.
5. Cut the caulking tip
It is important to cut the tip of the caulking at a 45-degree angle or less. The angle allows you to tuck the tip into a corner, placing the caulk exactly where it needs to be. Make sure to cut a small hole, as you will be able to control your flow and minimize the sloppy effects of air bubbles in the tube.
If the caulking gun is just too hard to squeeze, you can cut a slightly bigger hole. Some caulking tubes have seals that need to be punctured before use. Most caulking guns have a wire “poker” underneath to do the job, but you can use a wire hanger if necessary.
6. Move steadily as you go
Start in a corner, but do not tuck the nozzle into it, as this always creates a mess. Place the nozzle on the baseboard’s top edge against the wall about 1/4 inch and start caulking. Be sure that you are moving and squeezing at the same time in a constant motion.
Using a smooth motion and a steady hand, work out from the corner toward the middle of the wall. You do not have to caulk the whole baseboard in one pass. Repeat the same process from the opposite corner, allowing the caulking to meet in the middle. For the bigger gaps, slow down and let more caulking flow into the void.
7. Cleaning up
Wet your finger on your clean damp rag, and use your finger to smooth the caulking bead. Use a bit of the excess caulking on your finger to finish any gaps you may have left in the corner. Be sure to keep your finger wet to avoid pulling any of the caulking out of the seam.
Wiping your finger on the wet rag between passes will ensure you do not create an excess mess. If your baseboards have quarter-round mouldings, repeat steps five through seven to caulk them.
8. Caulk the miters (corner joints of baseboards)
To caulk the inside miters, run a thin bead of caulk from the bottom edges of the miters to the top. Then, dampen your finger and run it along the bead to press it into the corner.
If your miters have large gaps (it happens), do not use your finger; instead, use a putty knife to shape a perfectly square corner. You can caulk the outside miters, too, but wood filler works better. With a putty knife, spread the wood filler, allow it to dry, then sand it smooth for a perfect miter.
Now that you are a home improvement star, sit back and enjoy your nicely caulked baseboards.
At Cosmaroma, we pride ourselves on offering a truly beneficial customer service experience, and we are crafters ourselves. So, make sure you take full advantage of our product expert’s wealth of knowledge by asking lots of questions and taking the time to complete your project right the first time. Contact a Cosmaroma expert today for more information.
